How to Install and Set Up Raspberry Pi OS: A Step-by-Step Guide
The Raspberry Pi is a versatile, low-cost computer used for a variety of projects, from learning programming to building DIY gadgets. The first step in using a Raspberry Pi is installing and setting up its operating system (OS). Raspberry Pi OS (formerly known as Raspbian) is the official operating system, optimized for the Raspberry Pi hardware. This guide will walk you through the installation and setup process.
Requirements
What You’ll Need
- Raspberry Pi (any model)
- MicroSD card (16GB or larger recommended)
- MicroSD card reader for your computer
- Power supply compatible with your Raspberry Pi
- Monitor, keyboard, and mouse (optional for a graphical interface)
- HDMI cable (for connecting the Raspberry Pi to the monitor)
- Computer with internet access
- Ethernet cable (optional for wired internet)
Depending on the type of pi you have, you'll need a differnt HDMI adapter:
- Raspberry Pi 4 & 5 use micro HDMI out ports so they require micro HDMI to HDMI cables or adapters.
- The Raspberry Pi Zero / Zero W / Zero 2 W have mini HDMI and therefore need mini HDMI to HDMI cables to connect to a display.
Step 1: Download Raspberry Pi Imager
Visit the official Raspberry Pi website to Download and Install the Raspberry Pi Imager for your operating system (Windows, macOS, or Linux).
Step 2: Prepare the MicroSD Card
Insert your MicroSD card into the card reader connected to your computer and launch the Raspberry Pi Imager. It will give you the options of selecting which Device, Which OS (64, 32 etc...) and which drive you want to write to.
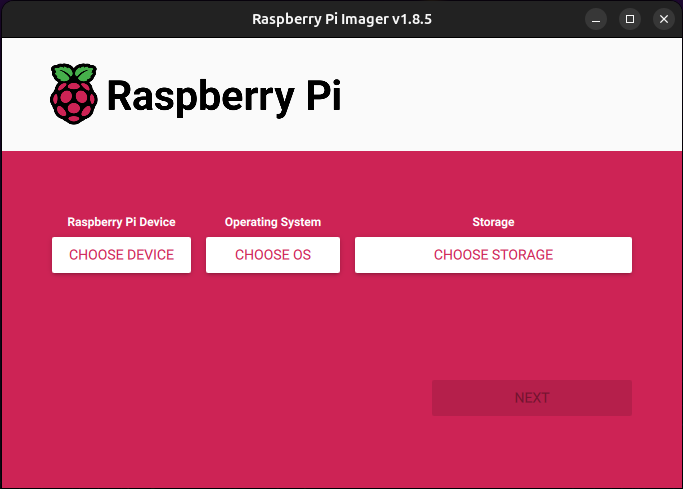
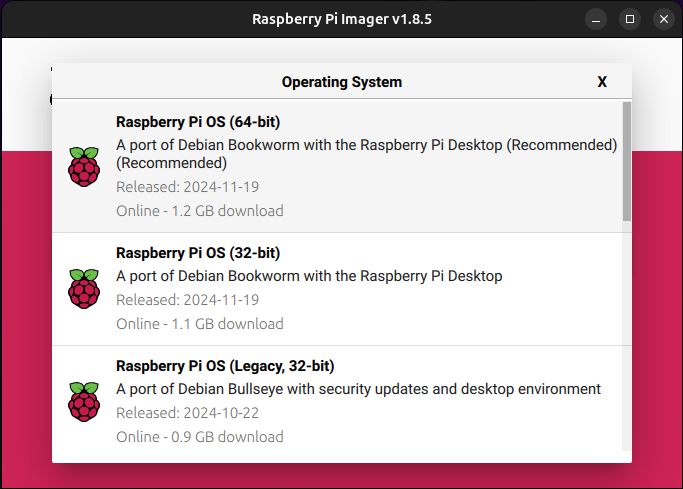
In the ImagerClick "Choose OS" and select "Raspberry Pi OS" (or another compatible OS).
After that you'll want to click "Choose Storage" and select your MicroSD card.
Advanced Settings
You can also set a number of other advanced settings in the image such as wifi credentials, log in info etc...:
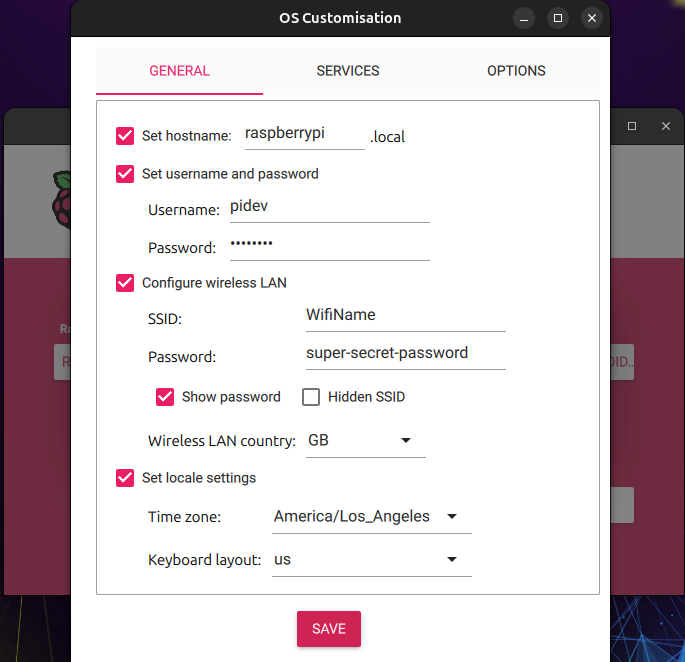
- (Optional) For advanced configuration, click the gear icon to: Set up Wi-Fi credentials.
- Enable SSH.
- Set a hostname for your Raspberry Pi.
- Click "Write" to flash the OS onto the MicroSD card.
Once completed, safely eject the MicroSD card from your computer.
Step 3: Set Up Raspberry Pi Hardware
Insert the MicroSD card into the Raspberry Pi's card slot and connect the following to your Raspberry Pi:
- Monitor via the HDMI port.
- Keyboard and mouse via USB ports.
- Ethernet cable (optional for internet connection).
- Plug in the power supply to power on the Raspberry Pi.
Step 4: Complete the Initial Setup
After booting up, Raspberry Pi OS will guide you through the initial setup:
- Language and Country: Select your preferred options.
- Wi-Fi Network: Connect to your wireless network (if not using Ethernet or if you didn't set it up earlier).
- Password: Set a secure password for the default user.
- Update Software: Allow the system to check for and install updates.
Restart your Raspberry Pi if prompted.
Step 5: Customize Your Raspberry Pi
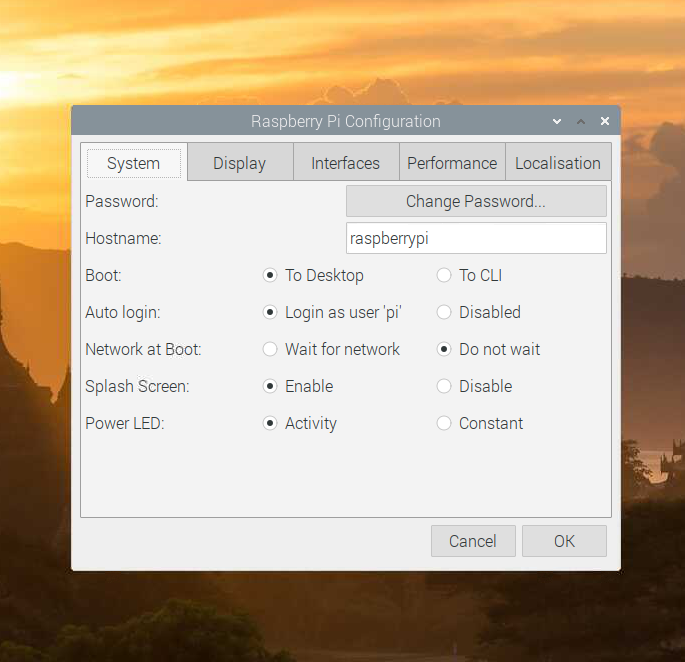
You now have a working raspberry pi os! You'll likely want to setup some confurations. Open the Raspberry Pi Configuration Tool:
- From the desktop: Go to Preferences > Raspberry Pi Configuration.
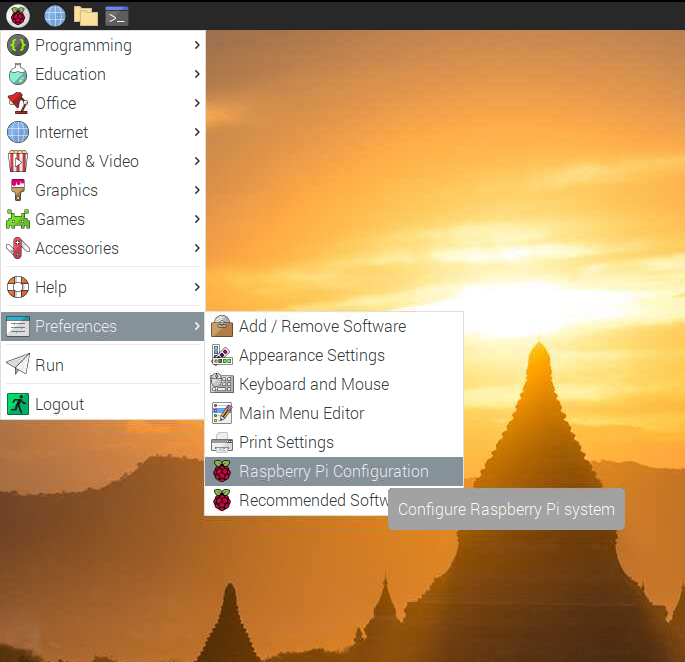
Alternatively you can also access it from the command line. From the command line:
sudo raspi-config.
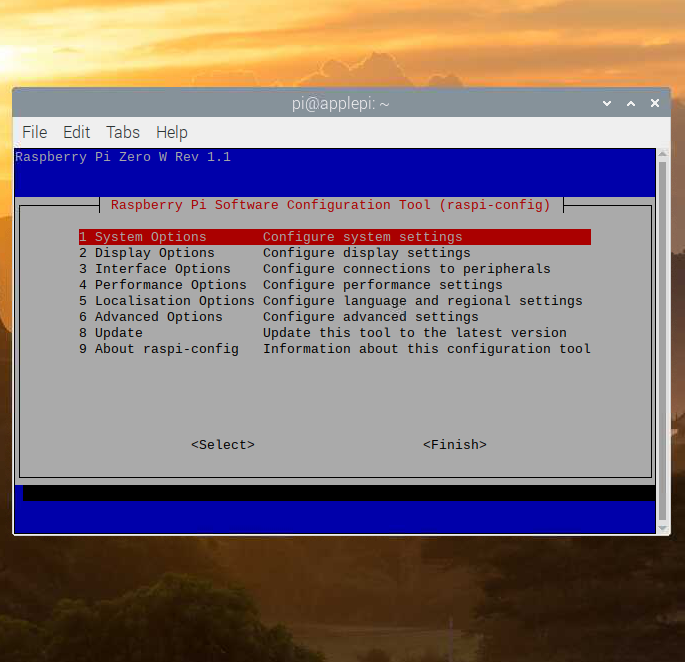
The raspberry configurator is a handy tool to help global settings such as:
- Interfaces: Enable SSH, VNC, or other interfaces for remote access.
- Screen Resolution: set the resolution of your screen.
- Performance: Adjust CPU and GPU settings if needed.
- Localization: Update timezone, keyboard layout, and other regional settings.
Step 6: Install Additional Software
Like most other debian-like system, you can Add/Remove Software in the desktop interface to install applications as well as from the terminal, install software using apt, e.g.,:
sudo apt update
sudo apt install <package_name>
Step 7: Explore and Experiment
Learn programming with pre-installed tools like Python and Scratch. Try popular Raspberry Pi projects:
- Media center with Kodi.
- Home automation with Home Assistant.
- Retro gaming with RetroPie.
Troubleshooting Tips
- If your Raspberry Pi doesn’t boot, recheck the MicroSD card and reflash the OS.
- Use a high-quality power supply to avoid unexpected shutdowns.
- Visit the Raspberry Pi forums for community support.
Congratulations! Your Raspberry Pi is now ready to use. Explore its capabilities and have fun with your projects!