How to Install Beszel Through Portainer to Monitor Multiple Raspberry Pi Computers: Step-by-Step Guide
Meta Description: Learn how to install Beszel through Portainer to monitor multiple Raspberry Pi computers. This complete step-by-step guide helps you configure agents and dashboards in minutes.
What is Beszel?
Beszel is a lightweight, container-based monitoring solution tailored for system administrators and hobbyists who want an efficient way to monitor multiple Linux systems. Designed by the creator of systeminformation for Node.js, Beszel excels at tracking metrics like:
- CPU usage
- RAM consumption
- Disk I/O
- System uptime
- CPU temperature (on Raspberry Pi)
When managing a fleet of Raspberry Pi devices, Beszel offers a centralized dashboard that visualizes all system statuses at once.
Why Use Portainer for This Setup?
Portainer is a user-friendly GUI that manages Docker containers, volumes, networks, and images through a browser. Using it to deploy Beszel:
- Eliminates terminal dependency
- Simplifies container configuration
- Centralizes control across all nodes
Whether you're new to Docker or an experienced sysadmin, Portainer streamlines the Beszel deployment process considerably.
Pre-Installation Requirements
Before jumping into the installation, you’ll need to prepare the environment.
Raspberry Pi Setup
Ensure each Raspberry Pi meets these criteria:
- Running Raspberry Pi OS
- Docker installed (
curl -sSL https://get.docker.com | sh) - Connected to the same local network
- SSH enabled (
sudo raspi-config> Interfacing Options > SSH)
For Portainer installation, follow this full guide:
🔗 How to Install Portainer on Raspberry Pi
Static IPs Recommended
Assign static IPs or configure your router’s DHCP to avoid IP changes that could disrupt monitoring.
Installing Beszel Through Portainer: Step-by-Step
Once Portainer is set up on one of your Raspberry Pis, follow these instructions:
1. Access the Portainer Dashboard
Open your browser and go to your Portainer Install, usually at:
http://<Main_Pi_IP>:9000
2. Navigate to Stacks
Click on "Stacks" in the left sidebar and choose "Add Stack".
3. Name the Stack
Give it a name like beszel-dashboard.
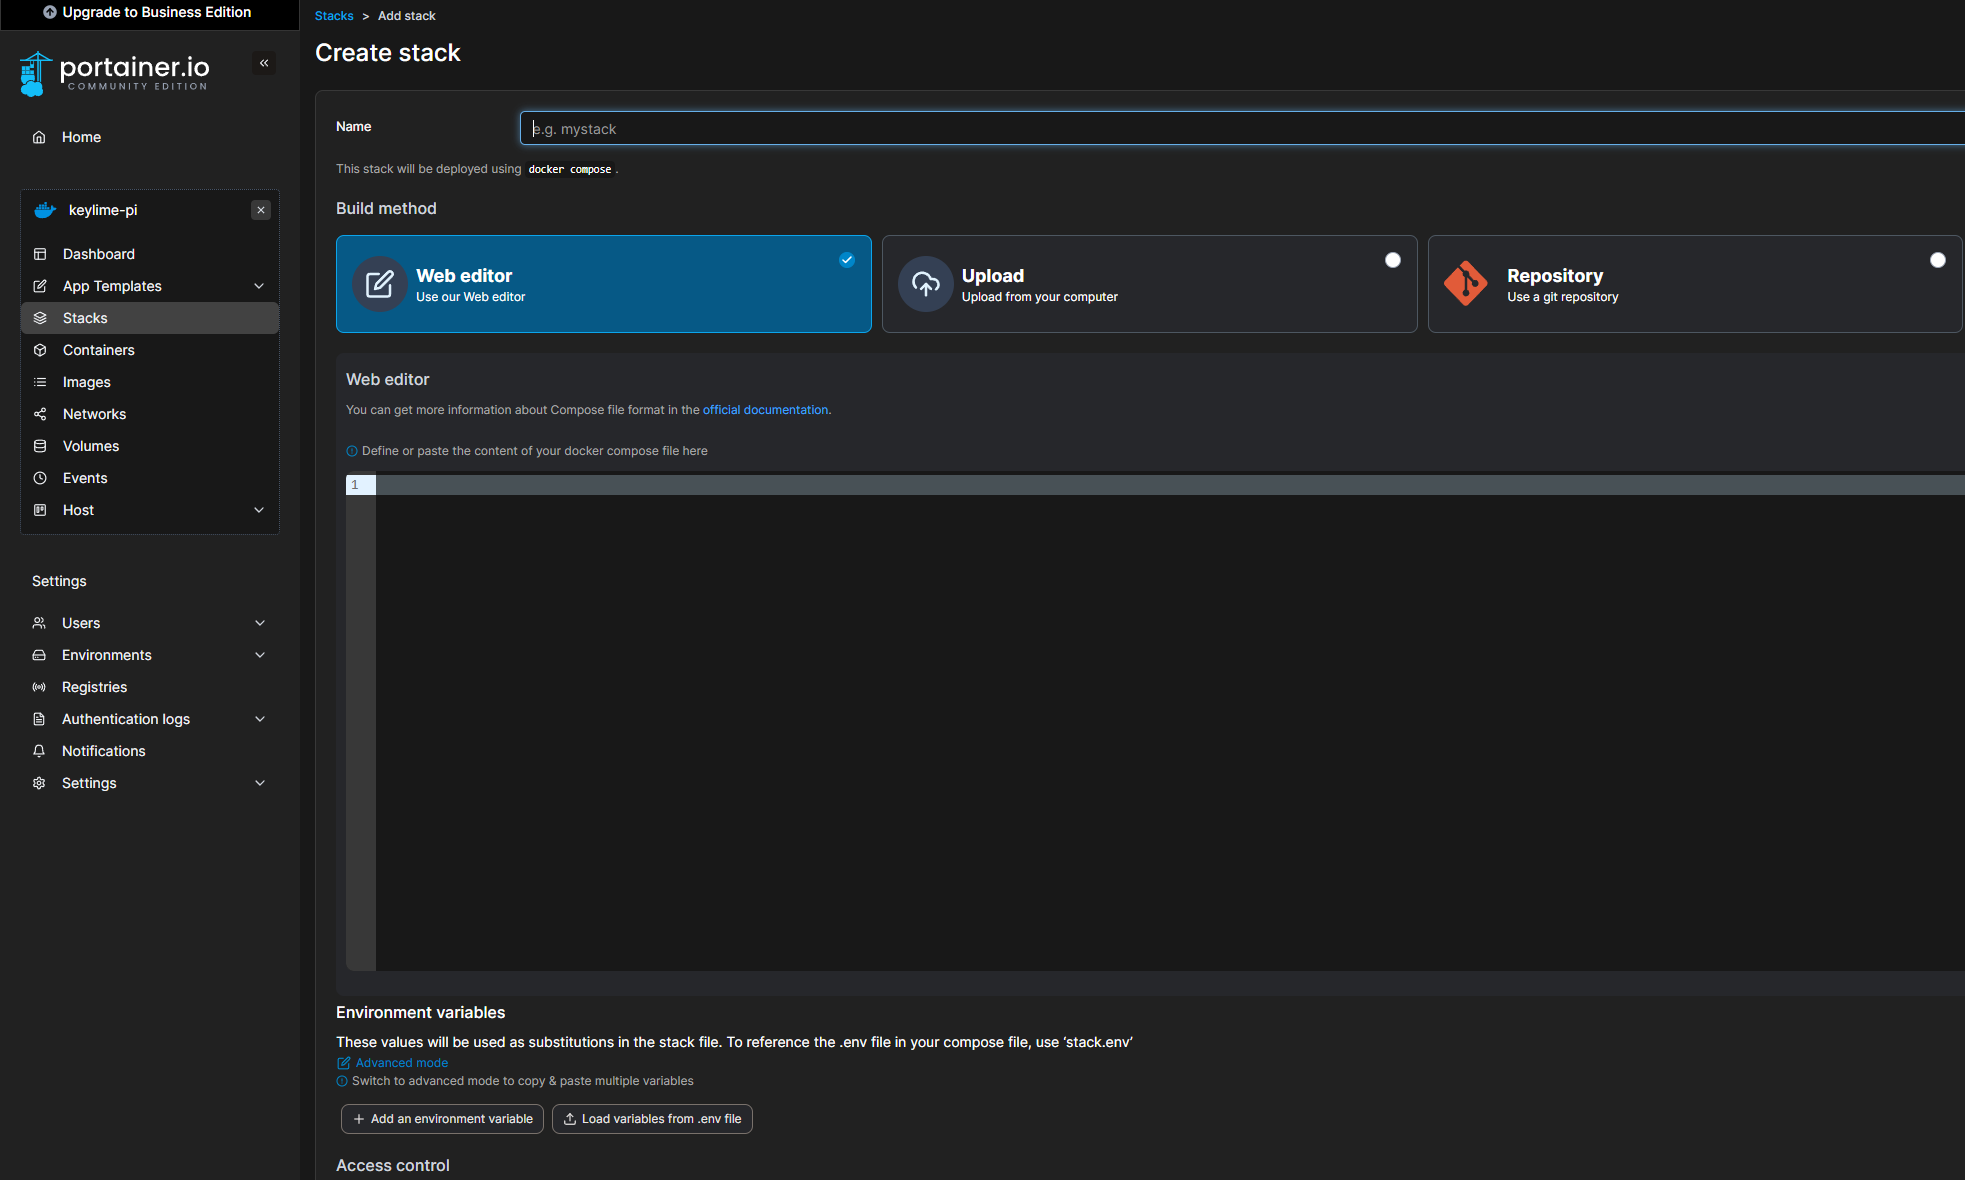
4. Paste the YAML Configuration
Copy this Docker Compose YAML:
version: '3.3'
services:
  beszel:
    image: sebhildebrandt/beszel
    container_name: beszel
    ports:
      - "3001:3001"
    restart: unless-stopped
    volumes:
      - /var/run/docker.sock:/var/run/docker.sock
    environment:
      - BESZEL_PORT=3001
5. Deploy the Stack
Click "Deploy the stack" and wait for the setup to finish. Beszel will now be running on port 3001.
Visit http://<Main_Pi_IP>:3001 to view the dashboard.
Deploying Beszel Monitoring Agents on Each Raspberry Pi
Each Raspberry Pi must run the Beszel agent container to report metrics to the main Beszel dashboard.
Run This Docker Command on Each Pi
docker run -d --restart=always \
--name beszel-agent \
-e NODE_NAME=pi-node-01 \
-e BESZEL_HOST=http://<Main_Pi_IP>:3001 \
-v /:/host:ro \
ghcr.io/sebhildebrandt/beszel-agent:latest
Replace pi-node-01 with a unique identifier for each device (e.g., sensor-pi, media-center)
<Main_Pi_IP> with the IP address of the main device running Beszel
Repeat this step for each additional Pi.
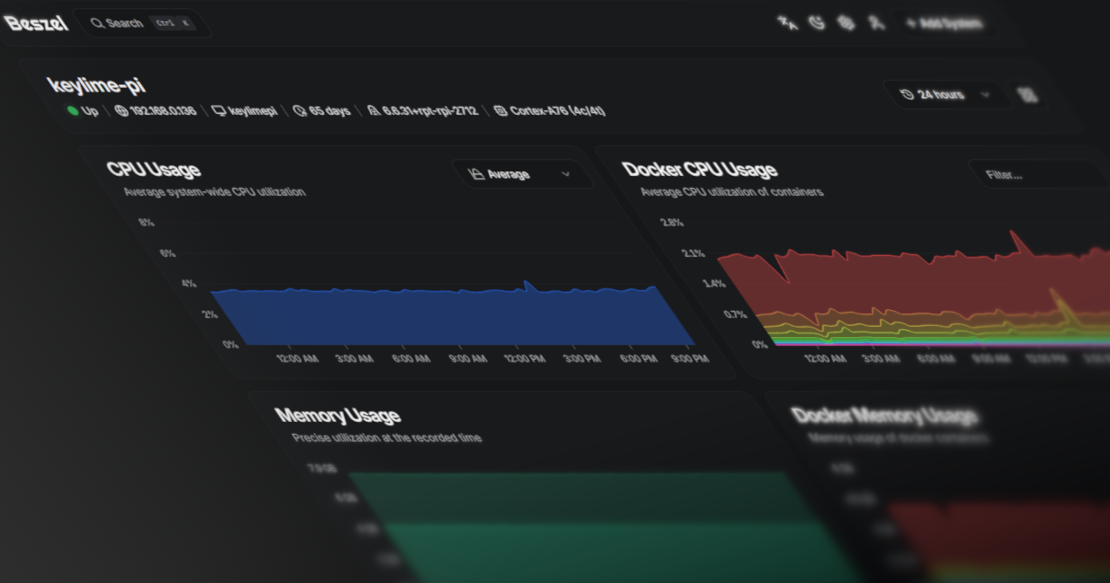
Verifying Beszel Setup and Monitoring Multiple Pis
Once agents are running, revisit the Beszel dashboard:
http://<Main_Pi_IP>:3001
You should now see each Raspberry Pi listed under its NODE_NAME
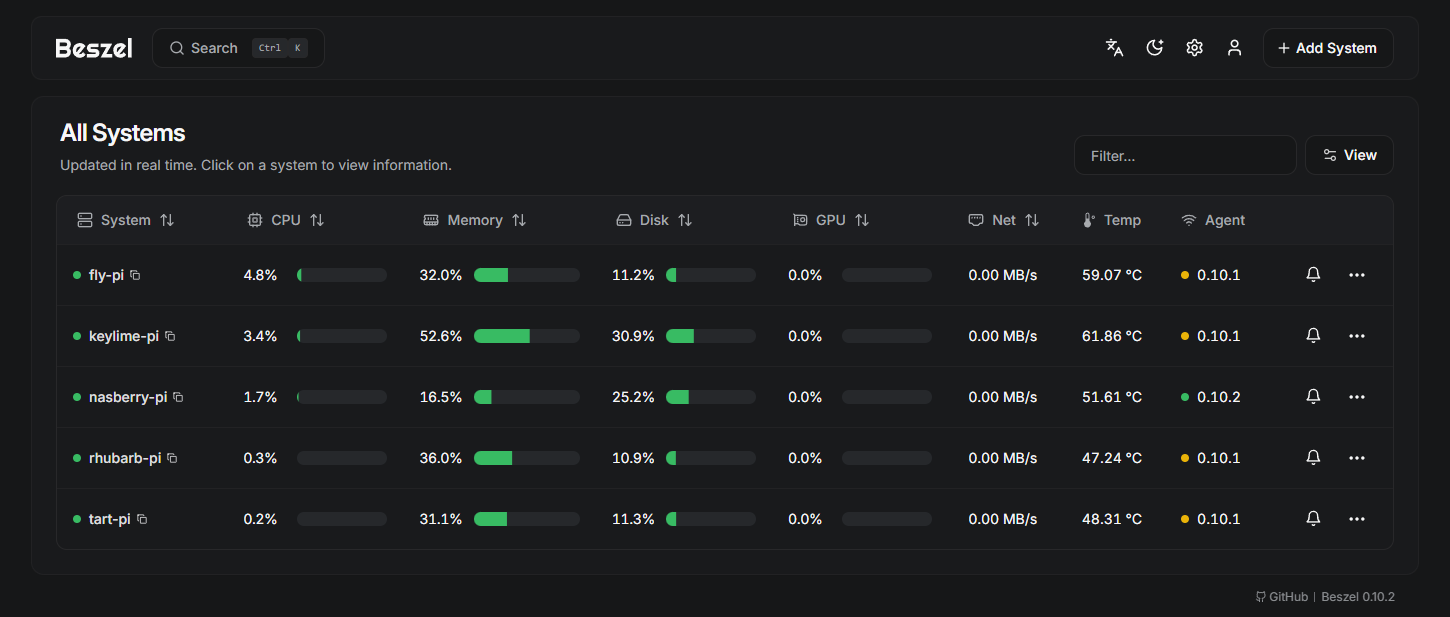
Under each Node you'll also see each of live system metrics like temperature, memory, and load all as Color-coded health indicators.

Troubleshooting Basics
- If a node doesn't appear: check Docker logs (docker logs beszel-agent)
- Ensure no firewall is blocking port 3001
- Confirm the static IPs are correct
Tips for Enhancing Beszel Monitoring
- Name Each Node Clearly: Use intuitive names like lab-pi-1, iot-node2, pi-media.
- Group Pis by Function: Color code or categorize nodes on a whiteboard or in a spreadsheet for cross-reference.
- Monitor Logs: Access container logs via Portainer to diagnose any issues.
FAQs About Setting Up Beszel via Portainer
Q1: Do I need to install Beszel on every Pi? No. Only the Beszel agent runs on each Pi. The main Beszel dashboard runs on a single host (usually one Pi).
Q2: Can I use hostnames instead of IP addresses? Technically yes, but IPs are more stable unless you configure mDNS or local DNS.
Q3: Does Beszel support alerting? Not natively. For alerts, consider pairing with Prometheus + Grafana or setting up cron-based checks.
Q4: Can I restart the stack from Portainer? Yes, go to the stack and click “Recreate” or restart the container from the UI.
Q5: Is it secure to expose Beszel over the internet? Not recommended. Use a VPN or secure reverse proxy like NGINX with authentication.
Q6: How do I update Beszel? Re-deploy the stack with the latest image by clicking “Pull latest image” and then redeploying.
Conclusion and Summary
Installing Beszel through Portainer offers a powerful and efficient way to monitor multiple Raspberry Pi computers. With minimal effort, you can deploy agents, view system health, and keep your Pi network optimized—all via a slick web interface.
💡 Take your Raspberry Pi monitoring to the next level with Beszel + Portainer—and spend more time innovating, less time debugging.